There are a few steps in order to change the favicon of your blog. Your blog comes with an icon looking like this  . There are a couple of ways to change this. I will present two, both involve creating the icon yourself:
- You can add a small icon of 16x16 to your blog using this guide. This is by far the easiest way. But hold on - read on, as there are some drawbacks to this.
- Creating a 16x16 icon will get you a long way, and will look nice in most scenarios. However, different devices requires different favicon sizes (If you are into the technical details you may want to read this). Meaning that a user using an ipad needs a different icon from those who are on a laptop. To cover most devices we should use an icon of the size 260x260.
Of the presented options above - i will cover step two in this blog post.
1. Creating the icon
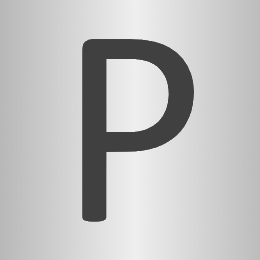
Favicons are usually just a letter or a symbol. Something that people can recognize. If you have a logo you can use that or maybe you have a creative friend or colleague who can help you. Even better you can give it a try yourself. You can even just use the photo editor that comes with your pc (paint). Just remember to make the image 260x260 pixels. There are also several online tools to create favicons.
I created my favicon using paint .net:
2. Generating icon sizes
For this task I would use an online tool such as realfavicongenerator.net. They easily generate all the images you need and the html (mark up) as well. Which means that all you have to do is upload your favicon. Then you will be able to download a zip file with all the formats, and mark up for referencing it.
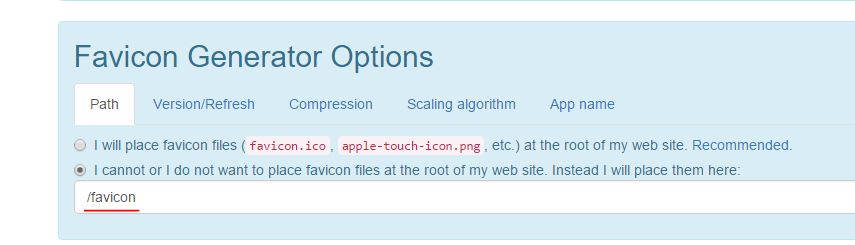
When using realfavicongenerator.net leave everything as is. But check the checkbox that says you want to place your icons outside the root folder. I choose to put mine in a new folder named favicon Like this:
This will create a downloadable package and some code. Download your newly generated icons. Do not close the browser tab! We will need the code from it in the next step.
3. Adding your favicon to your theme
In order to add your new favicon to your site you will need your current ghost blog theme. If you do not know how to get this, follow this guide.
There are two things you have to do in your downloaded theme. First we will add your newly created icons. Then we will reference them in the mark up.
Inside your theme you will find an assets folder:
- Open your assets folder
- Create a folder named "favicon"
- Copy paste all the icons from the file you downloaded earlier
Now that the icons are inside your assets folder we will have to reference them. In the root of your theme you will find a default.hbs file. Open this. You will find a line of html similar to this:
<link rel="shortcut icon" href="{{asset "favicon.ico"}}">
This line should be replaced by the code lines created from realfavicongenerator.net. There is however a little copy paste to do here. Every reference will need {{asset }} appended to it. Meaning that:
<link rel="apple-touch-icon" sizes="57x57" href="favicon/apple-touch-icon-57x57.png">
will be:
<link rel="apple-touch-icon" sizes="57x57" href="{{asset "favicon/apple-touch-icon-57x57.png" }}">
Which will look something like this at the end (which you may just copy):
	<link rel="apple-touch-icon" sizes="57x57" href="{{asset "favicon/apple-touch-icon-57x57.png"}}">
	<link rel="apple-touch-icon" sizes="60x60" href="{{asset "favicon/apple-touch-icon-60x60.png"}}">
	<link rel="apple-touch-icon" sizes="72x72" href="{{asset "favicon/apple-touch-icon-72x72.png"}}">
	<link rel="apple-touch-icon" sizes="76x76" href="{{asset "favicon/apple-touch-icon-76x76.png"}}">
	<link rel="apple-touch-icon" sizes="114x114" href="{{asset "favicon/apple-touch-icon-114x114.png"}}">
	<link rel="apple-touch-icon" sizes="120x120" href="{{asset "favicon/apple-touch-icon-120x120.png"}}">
	<link rel="apple-touch-icon" sizes="144x144" href="{{asset "favicon/apple-touch-icon-144x144.png"}}">
	<link rel="apple-touch-icon" sizes="152x152" href="{{asset "favicon/apple-touch-icon-152x152.png"}}">
	<link rel="apple-touch-icon" sizes="180x180" href="{{asset "favicon/apple-touch-icon-180x180.png"}}">
	<link rel="icon" type="image/png" href="{{asset "favicon/favicon-32x32.png"}}" sizes="32x32">
	<link rel="icon" type="image/png" href="{{asset "favicon/android-chrome-192x192.png"}}" sizes="192x192">
	<link rel="icon" type="image/png" href="{{asset "favicon/favicon-96x96.png"}}" sizes="96x96">
	<link rel="icon" type="image/png" href="{{asset "favicon/favicon-16x16.png"}}" sizes="16x16">
	<link rel="manifest" href="{{asset "favicon/manifest.json"}}">
	<link rel="mask-icon" href="{{asset "favicon/safari-pinned-tab.svg"}}" color="#5bbad5">
	<link rel="shortcut icon" href="{{asset "favicon/favicon.ico"}}">
	<meta name="msapplication-TileColor" content="#da532c">
	<meta name="msapplication-TileImage" content="{{asset "favicon/mstile-144x144.png"}}">
	<meta name="msapplication-config" content="{{asset "favicon/browserconfig.xml"}}">
	<meta name="theme-color" content="#ffffff">
The above tags I have added right after the {{ghost_head}} tag in my default.hbs file.
Now all you have to do is zip and upload your theme. That's it, enjoy your new favicon!