Today I wanted to set up server timings for a project to see how easy it would be. I found out with a few lines you can add server timing and see these in the developer console. I used the ServerTiming package Lib.AspNetCore.ServerTiming as it has some good extensions you can use, so you do not have to write any boilerplate code.
First off, install the package:
Install-Package Lib.AspNetCore.ServerTiming
Next is setting up the server timing classes and adding the middleware, here you need to call AddServerTiming and UseServerTiming. First AddServerTiming (If you use a startup class it is found under ConfigureServices()):
builder.Services.AddServerTiming();
After building your app (and before run()) you must call UseServerTiming (under Configure() if you use a startup class):
app.UseServerTiming();
The full program.cs class will look something like:
var builder = Microsoft.AspNetCore.Builder.WebApplication.CreateBuilder(args);

builder.Services.AddControllers();
builder.Services.AddServerTiming(); //This

var app = builder.Build();

app.UseServerTiming(); //And this

app.MapControllers();
app.Run();
You are now ready to use the ServerTiming API!
Using the ServerTiming service
Next up is using the service. Below I have added it to the standard WeatherForecast app template shipped with Visual Studio:
private readonly IServerTiming _serverTiming;

public WeatherForecastController(IServerTiming serverTiming)
{
    _serverTiming = serverTiming;
}

[HttpGet(Name = "GetWeatherForecast")]
public async Task<IEnumerable<WeatherForecast>> Get()
{
    _serverTiming.AddMetric(2, "SomeMetric"); //here
    using (_serverTiming.TimeAction("SomeOtherMetric")) //and here
    {
        await Task.Delay(1000); //just to see it "works"
        return Enumerable.Range(1, 5).Select(index => new WeatherForecast
        {
            Date = DateTime.Now.AddDays(index),
            TemperatureC = Random.Shared.Next(-20, 55),
            Summary = Summaries[Random.Shared.Next(Summaries.Length)]
        }).ToArray();
    }
}
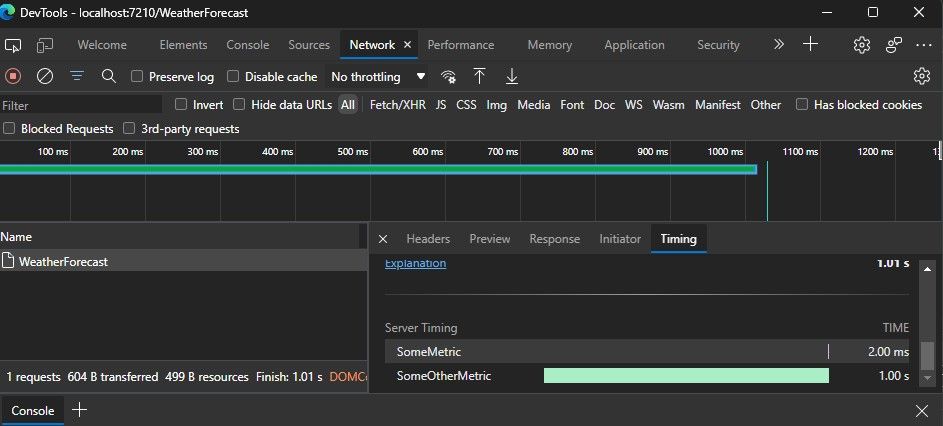
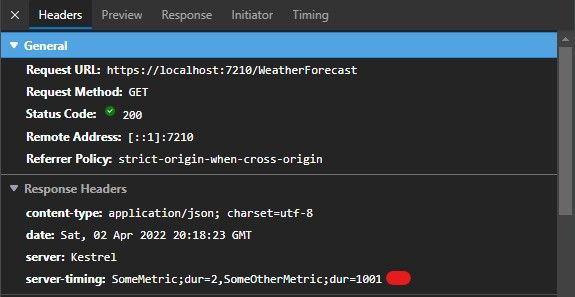
In the above we inject the ServerTiming class into the controller. During execution of the get method we add two metrics. One metric is just added with a fixed value of 2 (SomeMetric), the other is used in a using statement to encapsulate some code (SomeOtherMetric). I have added a Task.Delay(1000) just to test that this works. The TimeAction method times the whole block that it encapsulates and writes this to the TimeService upon disposal.
If you call this endpoint and look in the network tab of our browser, you will be able to see these server timings:

You can also see the raw values in the response from the server:

Wrapping all requests in a timer
If you want to time all the HTTP requests you have you can create some middleware and inject it. I created the below RequestTimingMiddleware which times the entire response:
public class RequestTimingMiddleware
{
    private readonly RequestDelegate _next;

    public RequestTimingMiddleware(RequestDelegate next)
    {
        _next = next;
    }

    public async Task Invoke(HttpContext context)
    {
        IServerTiming serverTiming = context.RequestServices.GetRequiredService<IServerTiming>();
        var timer = serverTiming.TimeAction("TotalRequestTime");

        context.Response.OnStarting(() => {
            timer.Dispose();
            return Task.CompletedTask;
        });
        await _next(context);
    }
}
To use this, inject it after the UseServerTiming middleware:
app.UseServerTiming();
app.UseMiddleware<RequestTimingMiddleware>();
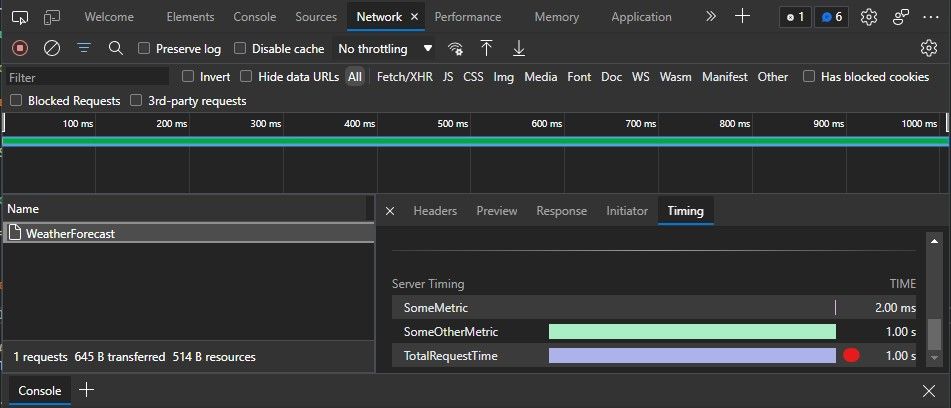
You will see in the timings that you get a new metric "TotalRequestTime":

That is it
I hope you found this informative, please leave a comment down below! Remember these server timings get exposed to everyone, so do not write anything you do not want anyone to see!