Dapper makes it easy to "Execute a query and map the results - if any - to a strongly typed List". This post demonstrates how to execute select, insert, update and delete statements with Dapper.
Quicklinks
Example table and class
For this post we will use the following table:
CREATE TABLE [dbo].[MyEntities](
	[Id] [int] IDENTITY(1,1) NOT NULL,
	[Text] [nvarchar](max) NOT NULL,
   CONSTRAINT [PK_MyEntities] PRIMARY KEY CLUSTERED
   (
	  [Id] ASC
   )
)
In the above is a table with a simple int identity column and a nvarchar column for a text. An image of this from SQL Management studio can be see below:
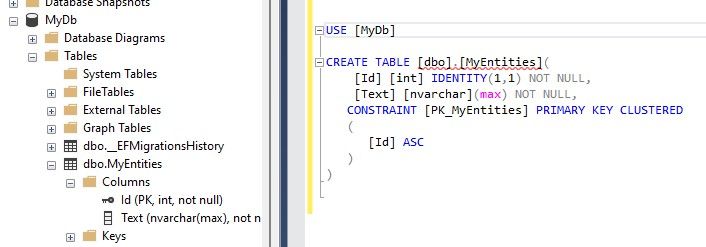
Nevermind the EFMigrationsHistory table, I have reused this database from a previous blog post :)
We will use the following matching class for the table:
[Table("MyEntities")]
public class MyEntity
{
    public int Id { get; set; }
    public string Text { get; set; }
}
It has a different name than the table as I like classes to be singular, for this to work we need to add the Table annotation. Other than that its properties match the table’s columns.
Insert
We can use the Execute method directly on an SQL connection to insert a row:
using (var sqlConnection = new SqlConnection(@"Data Source=localhost;Initial Catalog=MyDb;Integrated Security=True;"))
{
    sqlConnection.Execute("INSERT INTO [dbo].[MyEntities] (Text) VALUES (@Text);", new MyEntity { Text = "this is a text" });
}
In the above we open a connection to the database using a standard SqlConnection. We then provide a SQL insert statement along with the entity we want to insert to the Execute method. The execute method returns the number of rows affected, not the identity of the newly created row. However you can get that by using the output clause in your SQL statement the following:
using (var sqlConnection = new SqlConnection(@"Data Source=localhost;Initial Catalog=MyDb;Integrated Security=True;"))
{
    var identity = sqlConnection.QuerySingle<int>("INSERT INTO [dbo].[MyEntities] (Text) output inserted.Id VALUES (@Text);"
        , new MyEntity { Text = "this is a text" });
}
Using Dapper.Contrib
You can use the nuget package Dapper.Contrib to simplify the above further. The previous example can be reduced to the following with Dapper.Contrib:
using (var sqlConnection = new SqlConnection(@"Data Source=localhost;Initial Catalog=MyDb;Integrated Security=True;"))
{
    var identity = sqlConnection.Insert(new MyEntity { Text = "this is a text" });
}
With Dapper Contrib you do not have to write any SQL, it will map this by itself. Getting the identity is also built into the Insert statement.
Select
You can make a simple query in Dapper using one of the many extension methods on the connection. Below is an example of how to use the Query method:
using (var sqlConnection = new SqlConnection(@"Data Source=localhost;Initial Catalog=MyDb;Integrated Security=True;"))
{
    string sql = "SELECT id, text FROM [dbo].[MyEntities] WHERE id = @id";
    var results = sqlConnection.Query<MyEntity>(sql, new { id = 1 });
}
In the above we return a list of MyEntities mapped to our class MyEntity. You can also select a single record rather than a list of records:
using (var sqlConnection = new SqlConnection(@"Data Source=localhost;Initial Catalog=MyDb;Integrated Security=True;"))
{
    string sql = "SELECT id, text FROM [dbo].[MyEntities] WHERE id = @id";
    var results = sqlConnection.Query<MyEntity>(sql, new { id = 1 });
}
The above works as you would expect anything named Single to - it fails if there is not exactly one record returned, whereas QueryFirstOrDefault returns the first row with a match or else the default value (null in this case):
using (var sqlConnection = new SqlConnection(@"Data Source=localhost;Initial Catalog=MyDb;Integrated Security=True;"))
{
    string sql = "SELECT id, text FROM [dbo].[MyEntities] WHERE id = @id";
    var results = sqlConnection.QueryFirstOrDefault<MyEntity>(sql, new { id = 1 });
}
Update
Executing an update statement with Dapper is similar to an insert:
using (var sqlConnection = new SqlConnection(@"Data Source=localhost;Initial Catalog=MyDb;Integrated Security=True;"))
{
    string sql = "update [dbo].[MyEntities] set text = @text WHERE id = @id";
    var results = sqlConnection.Execute(sql, new MyEntity { Id = 1, Text = "this is another text"});
}
In the above we update the text of the entity with id 1. The code is similar to the insert, as it requires us to write our update statement and then provide matching parameters. The Execute method returns the number of rows affected.
Using Dapper.Contrib
You can use the nuget package Dapper.Contrib to simplify the above. The previous example can be reduced to the following with Dapper.Contrib:
using (var sqlConnection = new SqlConnection(@"Data Source=localhost;Initial Catalog=MyDb;Integrated Security=True;"))
{
    var results = sqlConnection.Update(new MyEntity { Id = 2, Text = "this is another text" });
}
In the above you do not have to write any SQL yourself, but only provide the object you want to be updated.
Delete
Executing a delete statement with Dapper is similar to an insert and update:
using (var sqlConnection = new SqlConnection(@"Data Source=localhost;Initial Catalog=MyDb;Integrated Security=True;"))
{
    string sql = "delete from [dbo].[MyEntities] WHERE id = @id";
    var results = sqlConnection.Execute(sql, new MyEntity { Id = 1 });
}
In the above we delete the entity with id 1. The code is similar to the insert and update, as it requires us to write our sql statement and then provide matching parameters. The Execute method returns the number of rows affected.
Using Dapper.Contrib
You can use the nuget package Dapper.Contrib to simplify the above. The previous example can be reduced to the following with Dapper.Contrib:
using (var sqlConnection = new SqlConnection(@"Data Source=localhost;Initial Catalog=MyDb;Integrated Security=True;"))
{
    var results = sqlConnection.Delete(new MyEntity { Id = 2 });
}
In the above you do not have to write any SQL yourself, but only provide the object you want to be deleted.
That is it
I hope you found this post helpful, if anything was unclear or have any other feedback please reach out in the comments down below!